Plugin Functionality
Asset Builder for Real Estate is a premium WordPress plugin that empowers developers, agencies,
and real estate businesses to visually present and manage multi-unit property sales — like apartments in multi-storey buildings —
using powerful interactive image maps and searchable, filterable listings.
Core Structure: Projects → Floors → Apartments
The plugin uses a logical hierarchy:
- Real Estate Projects (e.g., Residential Tower)
- Floor Plans (e.g., Floor 1, Floor 2, etc.)
- Apartments (e.g., Apartment #101)
Each layer builds on the one above.
Add a Real Estate Project
- Go to Asset Builder For Real Estate > Add and Manage Projects
- At the beginning you will see the project add form Add New Project
- Enter the Project Title, Description, upload images etc.
- Save the project, click Add Project
You can assign a floorplan to this project later.
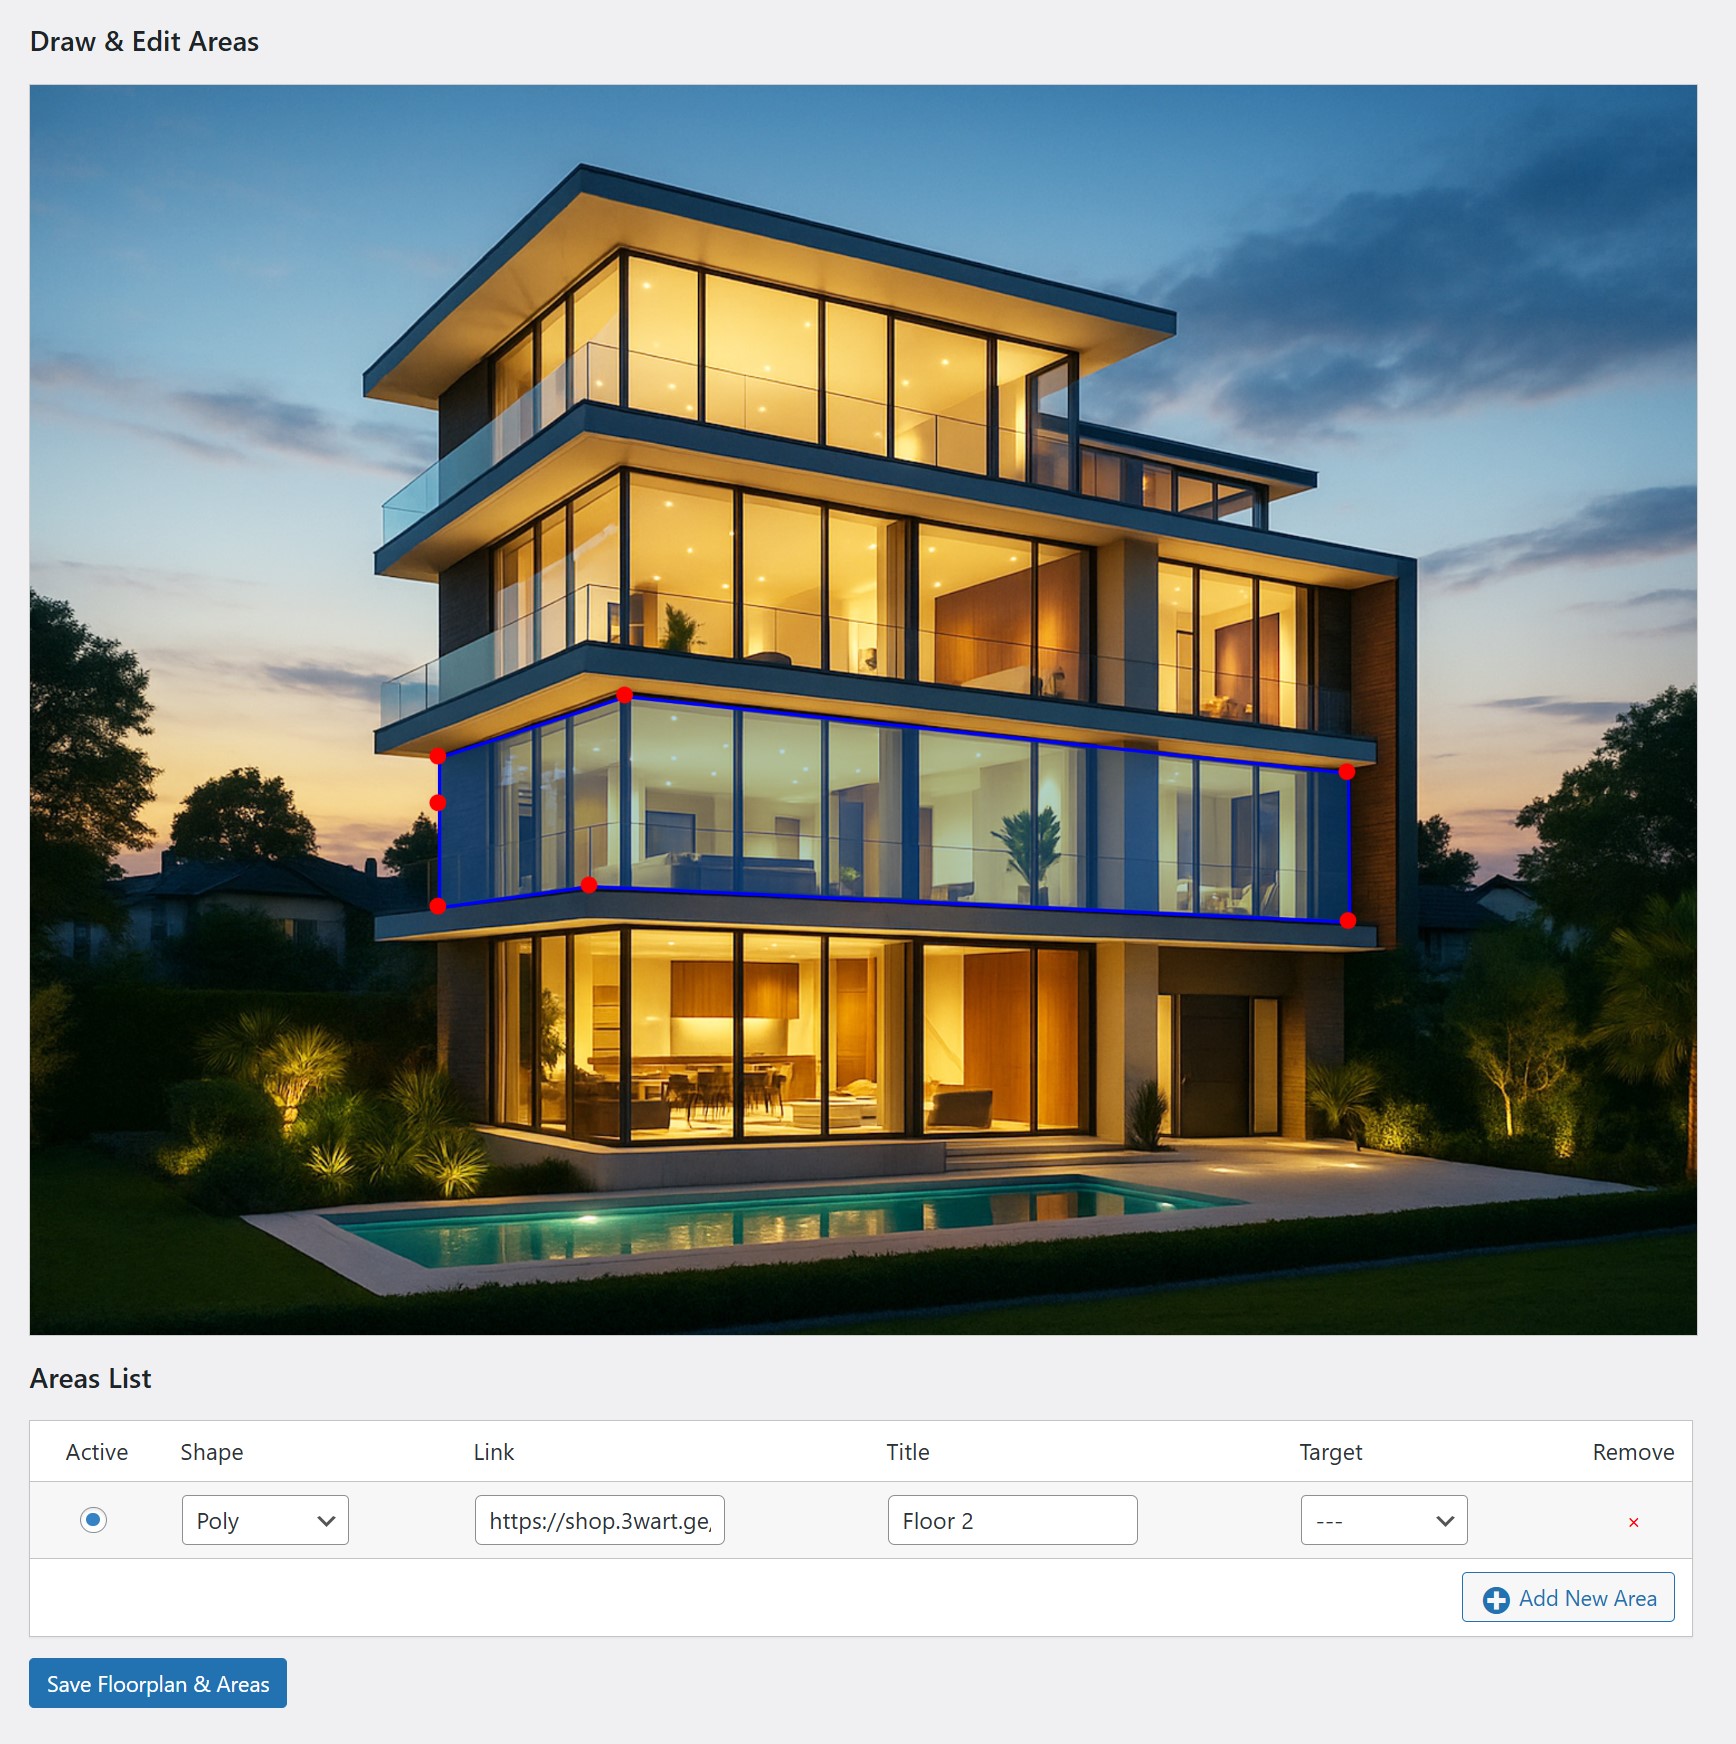
Add a Floor Plan (Main Floor Map)
- Go to Asset Builder For Real Estate > Add and Manage Floors
- Click Add New Floorplan
- Select a project from Select Project (the project must have been added previously)
- Upload an exterior image of the project as a Floorplan Image so that you can then use the outlines of this image to outline the floors of the building.
- Then, in the Areas List section below, click the Add New Area button to add a floor. (You must repeat this action every time you add a new floor.)
- Then start drawing points on the image to outline the desired floor. You can draw the points roughly the first time (when you draw the last point,
be sure to double-click the mouse to complete the outline and save it correctly) and save the polygons, and then adjust them in detail in edit mode.
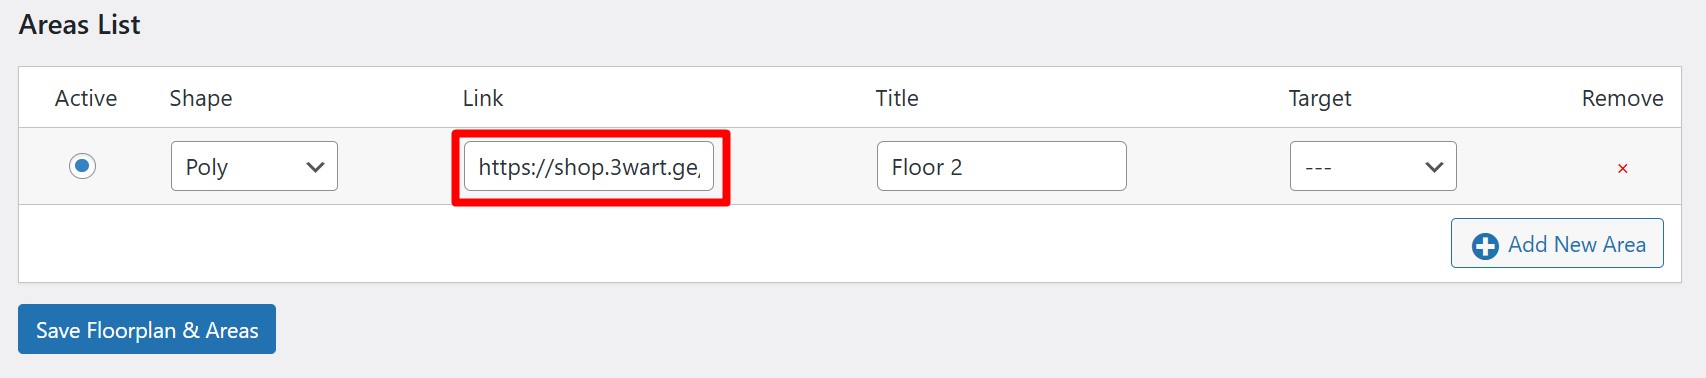
- When you draw a floor, you should give it a name, for example Floor 2
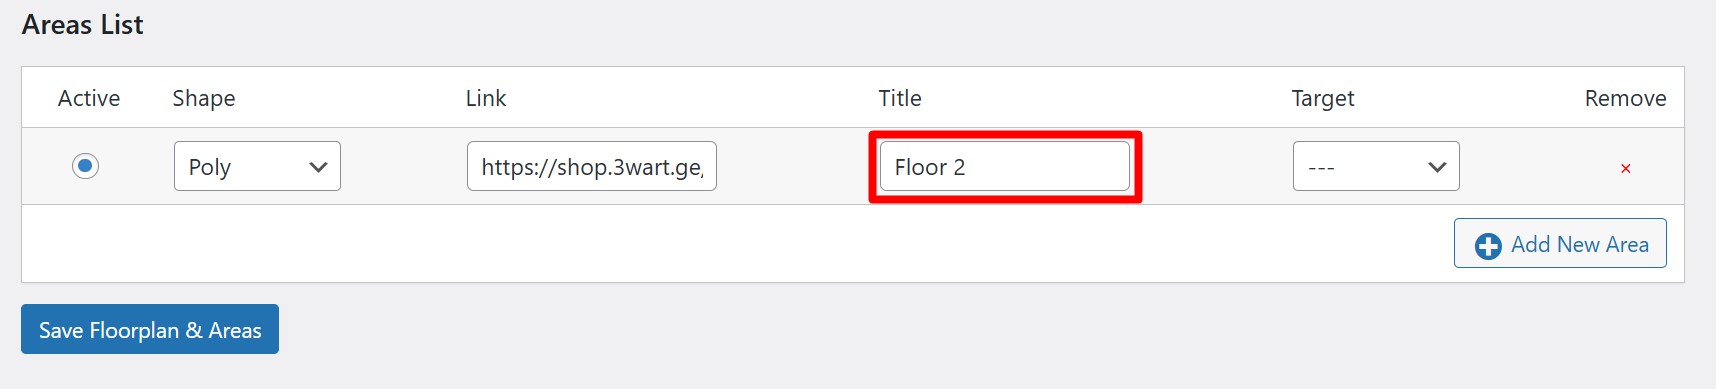
Leave the Link field empty, the system will automatically fill it in with the necessary link.
- Finally, when you are finished marking, click the Save Floorplan & Areas’ button .
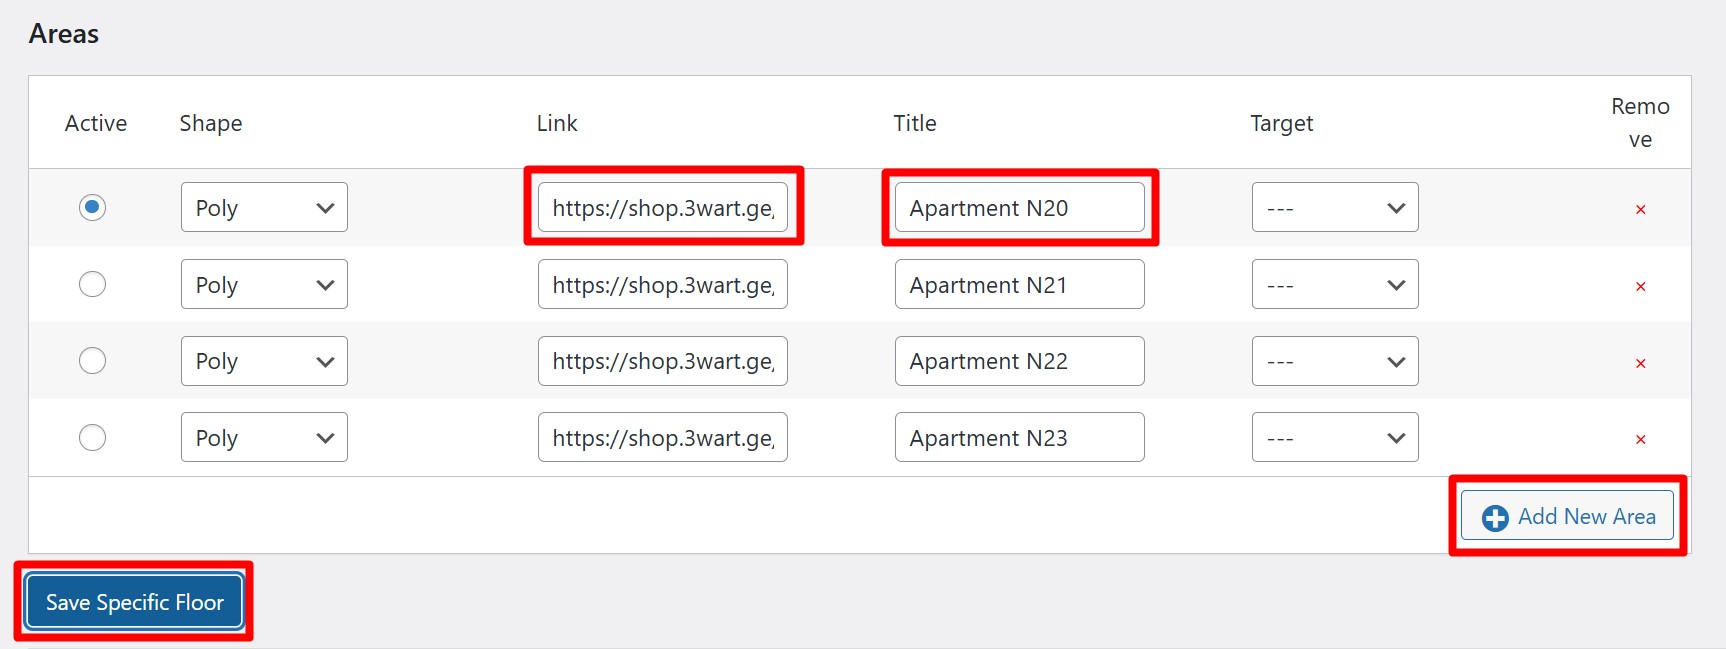
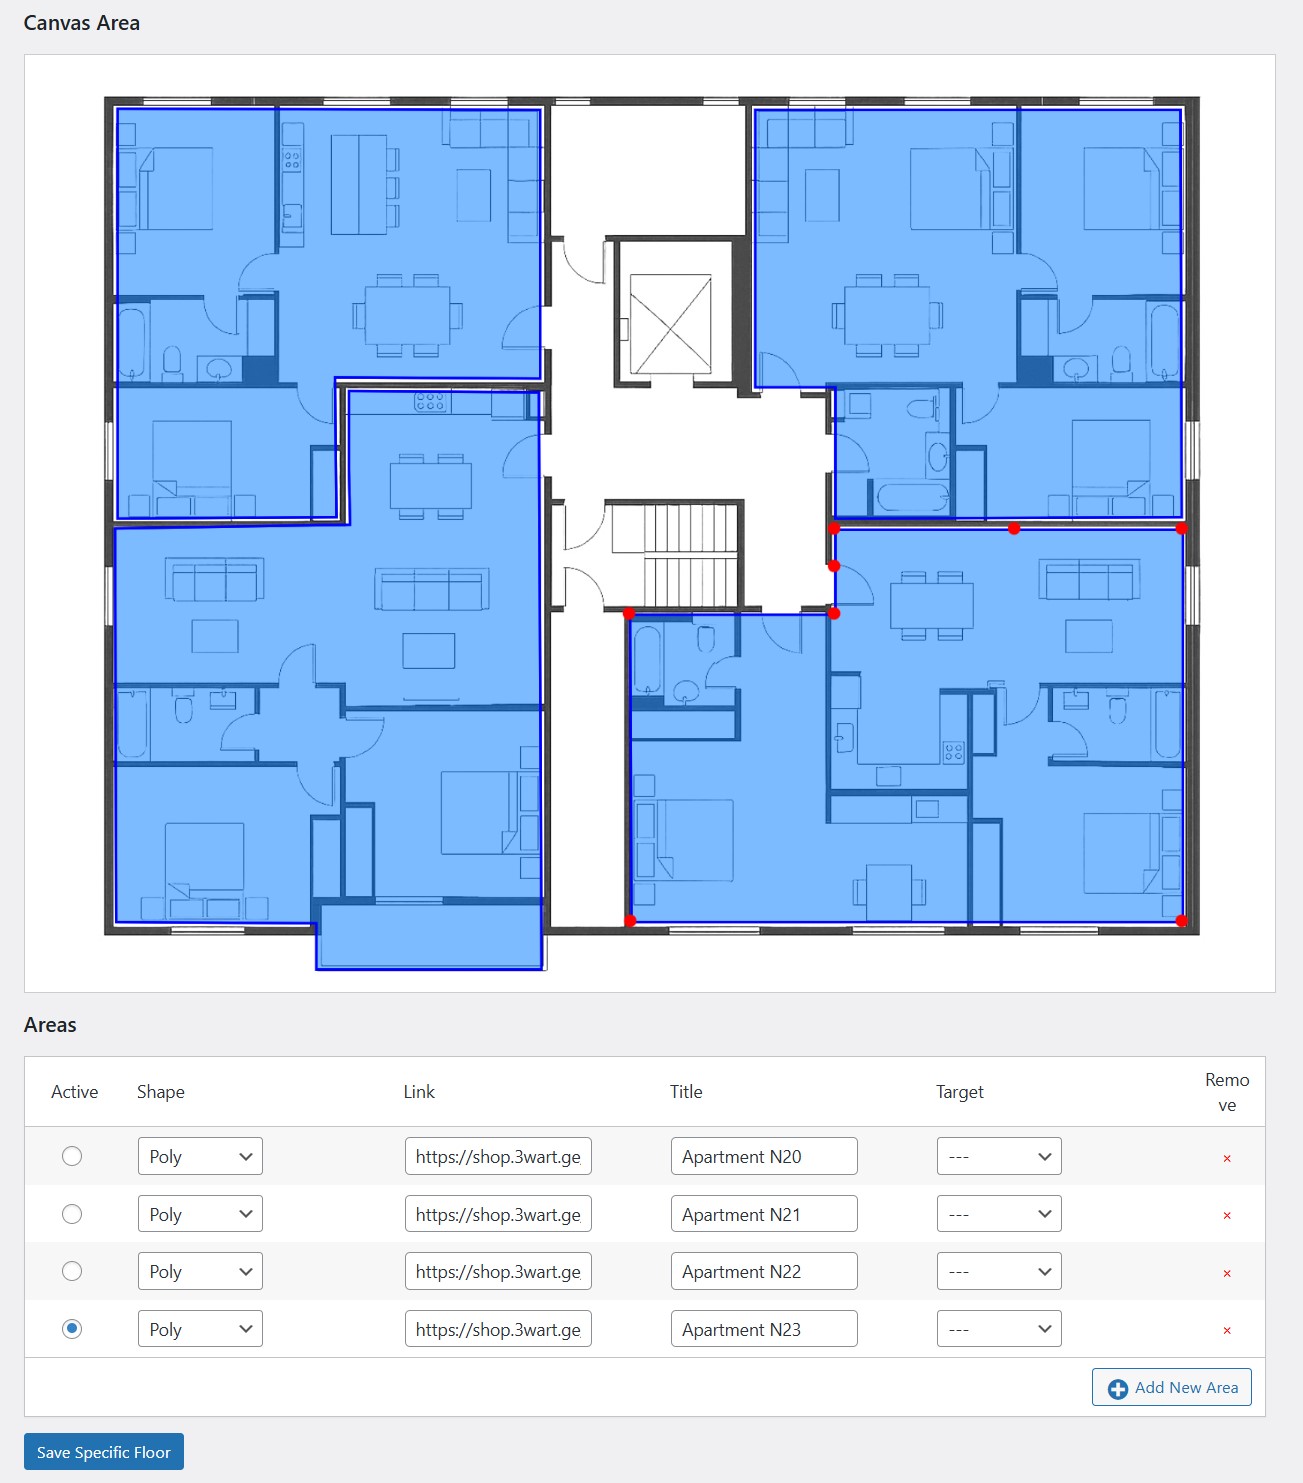
Add Specific Floor (e.g., Floor 2 with Apartments)
- Go to Asset Builder For Real Estate > Add and Manage a Specific Floor Plan
- At the beginning you will see a form to add a specific floor, Add Specific Floor
- From Attach to Existing Floorplan , select a previously created project floor plan
- In the Linked Area Title (Match with Main Floor) field, specify the name of the floor you are creating, for example Floor 2 That is, if you have a 5-story project, you create all five floors separately through this step
- In Upload Floor Image, upload an image of the specific floor plan you are currently creating
- Then, in the Areas section below, click the Add New Area button to select specific apartments on this floor
- Then start drawing points on a specific floor plan to outline the apartments on that floor.
You can first draw the points roughly (be sure to double-click the mouse when drawing the last point to complete the outline and save it correctly)
and save the polygons, then fine-tune them in edit mode.
- When you are finished defining a specific apartment, give it a name in Title, for example Apartment N20
Leave the Link field empty, the system will automatically fill it in with the necessary link
- Finally, when you have finished checking all the apartments, don’t forget to save them by clicking the Save Specific Floor button
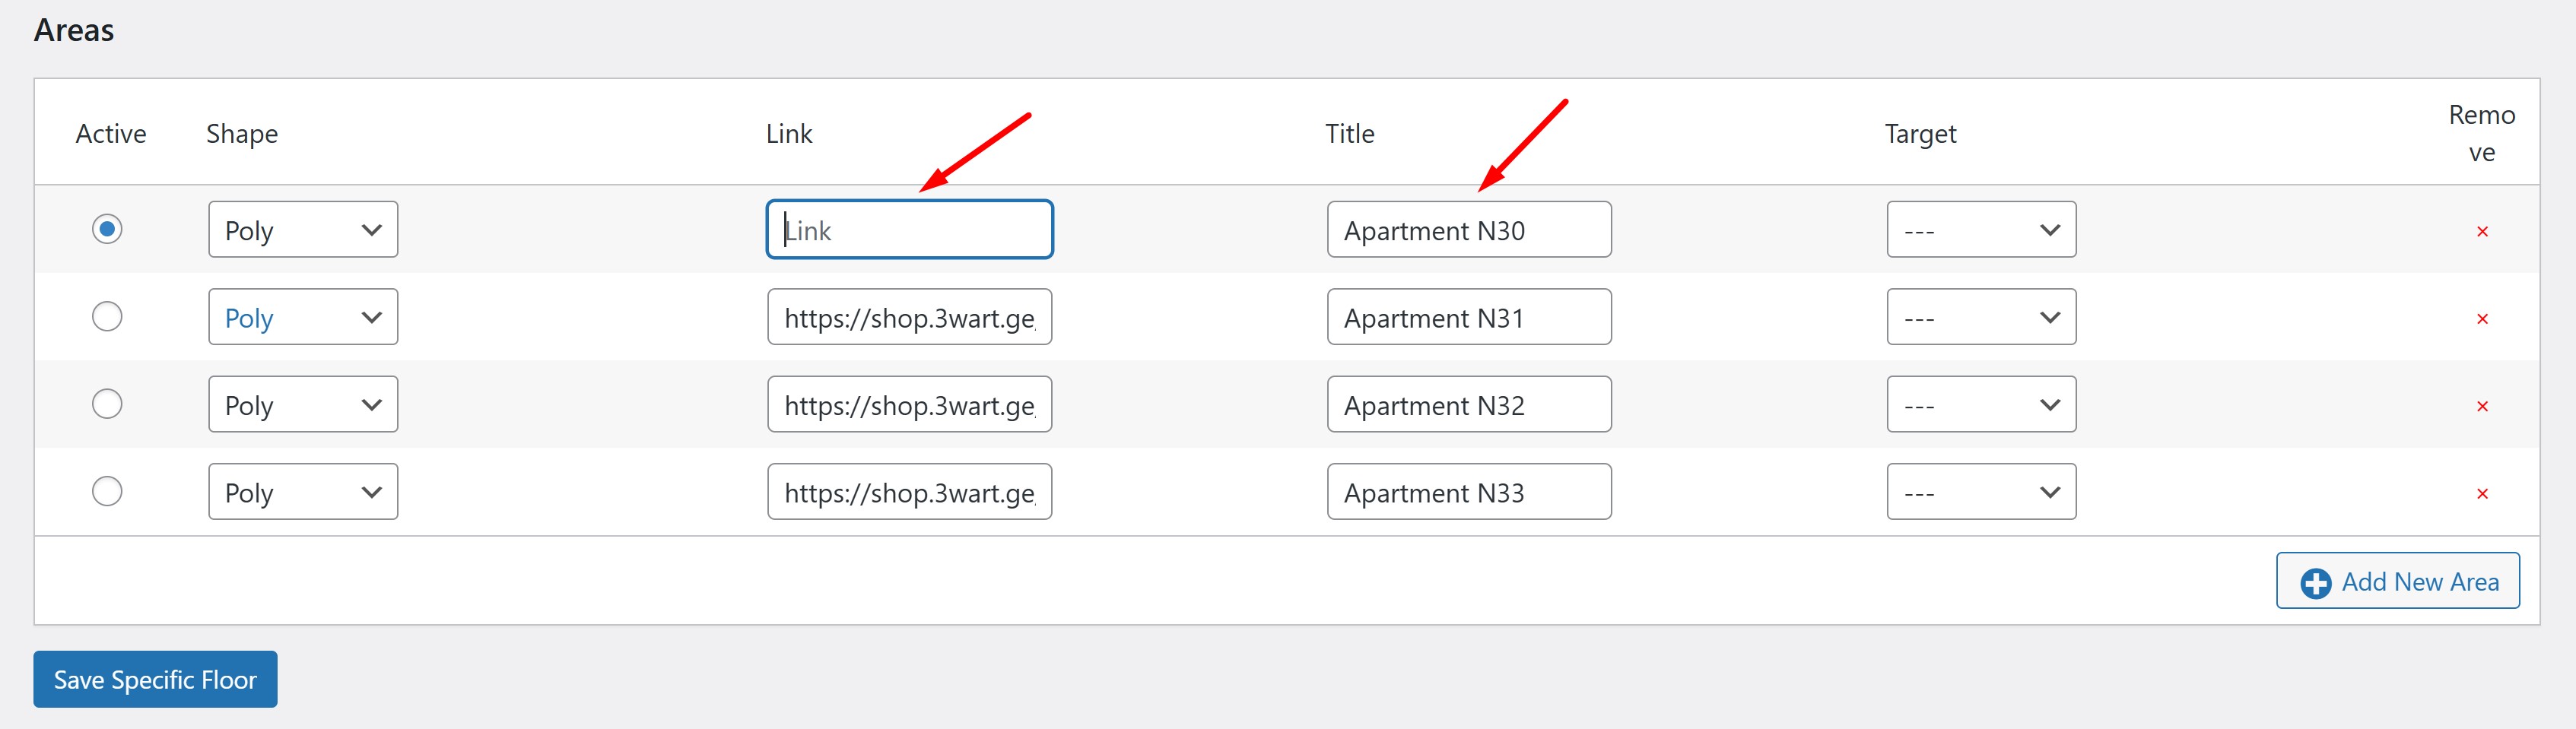
If you first add a specific floor plan and then an apartment for this floor, and the apartment has the same name as another project, for example
Apartment N30,
please note that after adding the apartment, you must enter the edit mode for that specific floor again, then delete the existing address, for example:
https://shop.3wart.ge/project/ocean-crown-tower/floor-3/apartment-n30/
Leave that field empty and then save everything again so that the full address of the apartment is correctly generated from the beginning, for example:
https://shop.3wart.ge/project/ocean-crown-tower/floor-3/apartment-n30-2/
The correct name of the apartment in this case is: apartment-n30-2
Watch the video
Add Apartments
- Go to Asset Builder For Real Estate > Add and Manage Apartments
- At the beginning of Manage Apartments you will find a form to add an apartment
- Fill in all fields:
- Select Project select appropriate project
- Select Floorplan select floor plan for that project
- Select Floor Area select specific floor, where you are adding this apartment e.g., Floor 2
- Apartment Name (e.g., Apartment N20)
- Price please indicate the price
- Area (m²) indicate the square volume.
- Floor Number please indicate the floor number.
- Rooms please indicate the number of rooms.
- Bedrooms please indicate the number of bedrooms.
- Bathrooms please indicate the number of bathrooms.
- Has Terrace? please indicate whether it has a terrace.
- 2D Image upload a 2D image of the apartment
- 3D Image upload a 3D image of the apartment
- Gallery Images upload pictures of the apartment
- Description enter apartment description
- Status please indicate the status of the apartment, whether it is for sale or sold
- Upload File (PDF, DOCX), for example Apartment Plan upload specs or documents (PDF)
- Click Add Apartment
Apartments will auto-match to areas in Specific Floors by title/slug.
Apartment Status Manager
- Go to Asset Builder For Real Estate > Apartment Status Manager
- If you need to filter apartments by projects
- The table below lists all the apartments, at the bottom under Toggle they have checkboxes, from there you can assign each apartment a status, Sold or For Sale
Plugin Settings
- Go to Asset Builder For Real Estate > Settings
- In Layout Settings Project Layout you can assign one of several styles to the project list
- In Currency Settings Currency Symbol you can define the currency symbol and its location
- Currency Symbol enter the currency symbol you want, for example, dollar: $
- Currency Position determine whether the currency symbol is on the left or right of the price
- In Polygon Appearance you can define the border and background color of the polygon that appears in the front of floor and apartment plans
Admin Management
You can manage:
- Projects (add, edit, delete)
- Floor Plans (you can draw project floors, delete or edit them)
- Specific Floors (on a specific floor, you can draw apartments, delete or edit them)
- Apartments (add, edit, delete, mark as sold/available)
- Apartment Status Manager you can assign each apartment a status, Sold or For Sale
Tips for Best Use
- Use clear area titles for better automatic matching
- Keep apartment slugs unique for SEO-friendly links
- Always save Floor Plans after editing shapes